SDJ-4000

No content has been added for this category page yet..
 

INSTALLATION


Firmware & Drivers


Firmware: Please download and install latest Firmware for SDJ-4000 from Gemini website.
The unit will not operate properly without the latest firmware.

Drivers: No drivers are required for the Gemini SDJ-4000 to operate. The device is a USB class compliant and your Operating System will auto-install the necessary drivers when connected with a USB cable.

VirtualDJ 2021 Setup


Download and install VirtualDJ 2021 from our Downloads Page
(in case you have not done already)

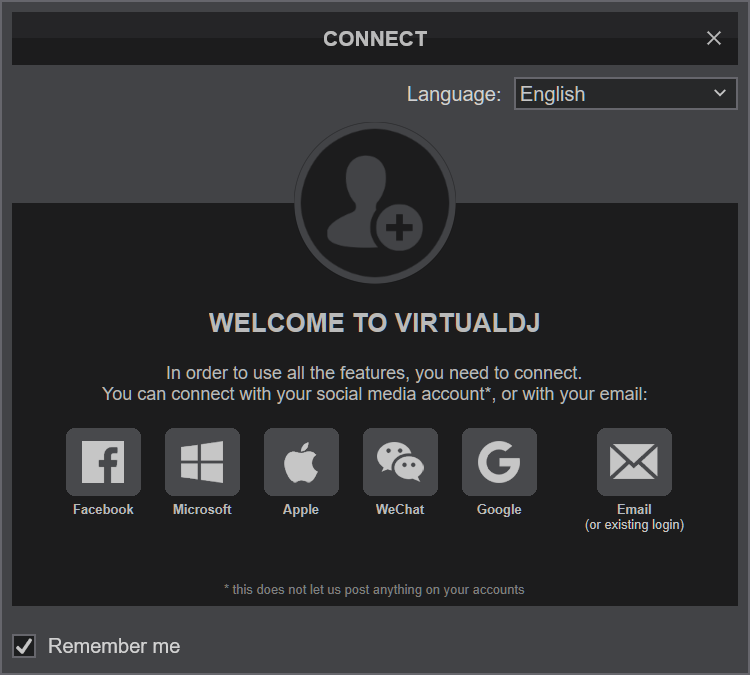
Once VirtualDJ 2021 is launched, a Login Window will appear. Please login with your preferred method from the ones provided.

A Pro Infinity, or a Pro Subscription License is required to fully use the Gemini SDJ-4000.
Without any of the above Licenses, the controller will operate for 10 minutes each time you restart VirtualDJ.
Buy a license

A detection window will appear next verifying proper connection with the SDJ-4000.
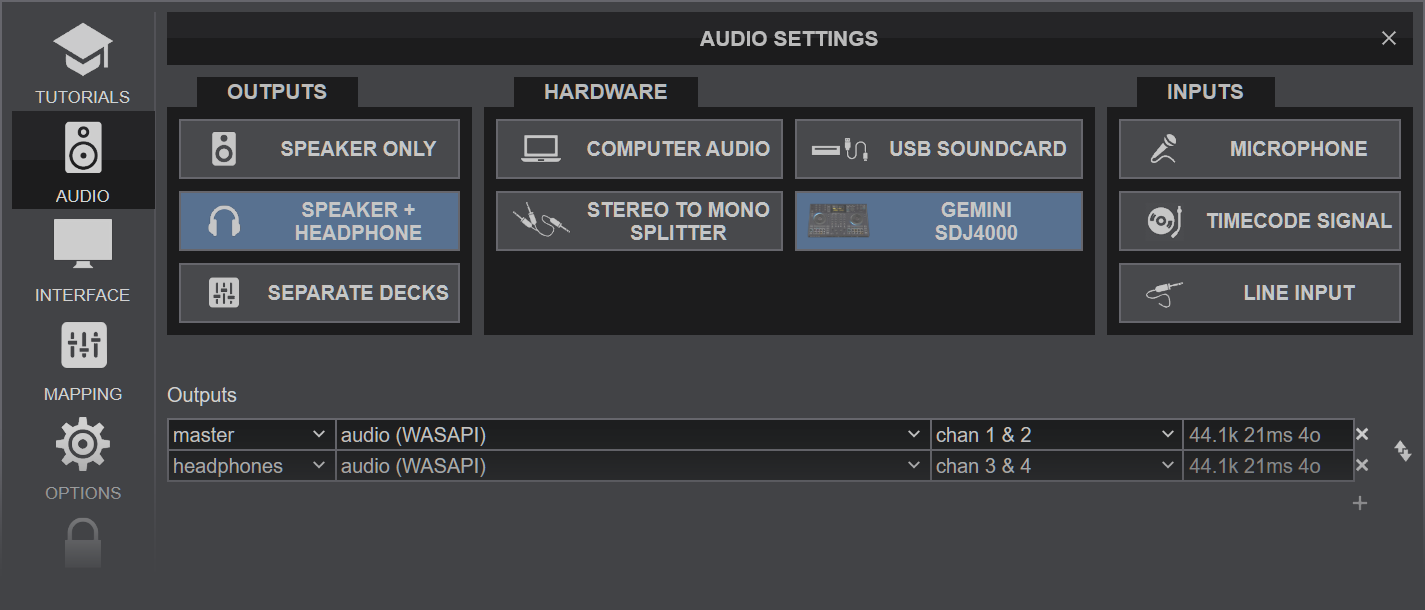
Click on the "SDJ4000" button for VirtualDJ to apply the predefined audio setup with the built-in sound card of the Gemini SDJ-4000. You can still change that from Settings->AUDIO tab.

Click to OK.


The unit is now ready to operate.


MIDI Operation
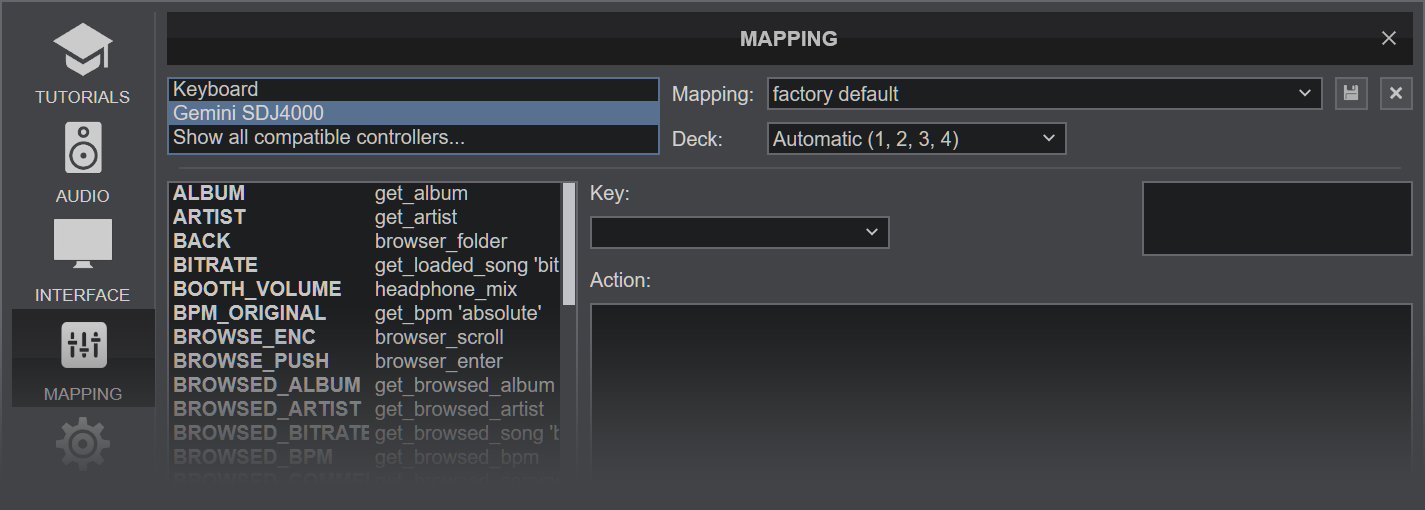
The unit should be visible in the CONTROLLERS tab of Config and the “factory default” should be available/selected from the Mappings drop-down list. The factory default Mapping offers the functions described in this Manual, however those can be adjusted to your needs via VDJ Script actions.


Find more details at VDJ Pedia

AUDIO Setup


The unit has a pre-defined Audio setup and a special button in the AUDIO tab of Config to provide that. Alternative Audio setups can be applied in the same window.


For further software settings please refer to the Manuals of VirtualDJ 2021
 

CONTROLS
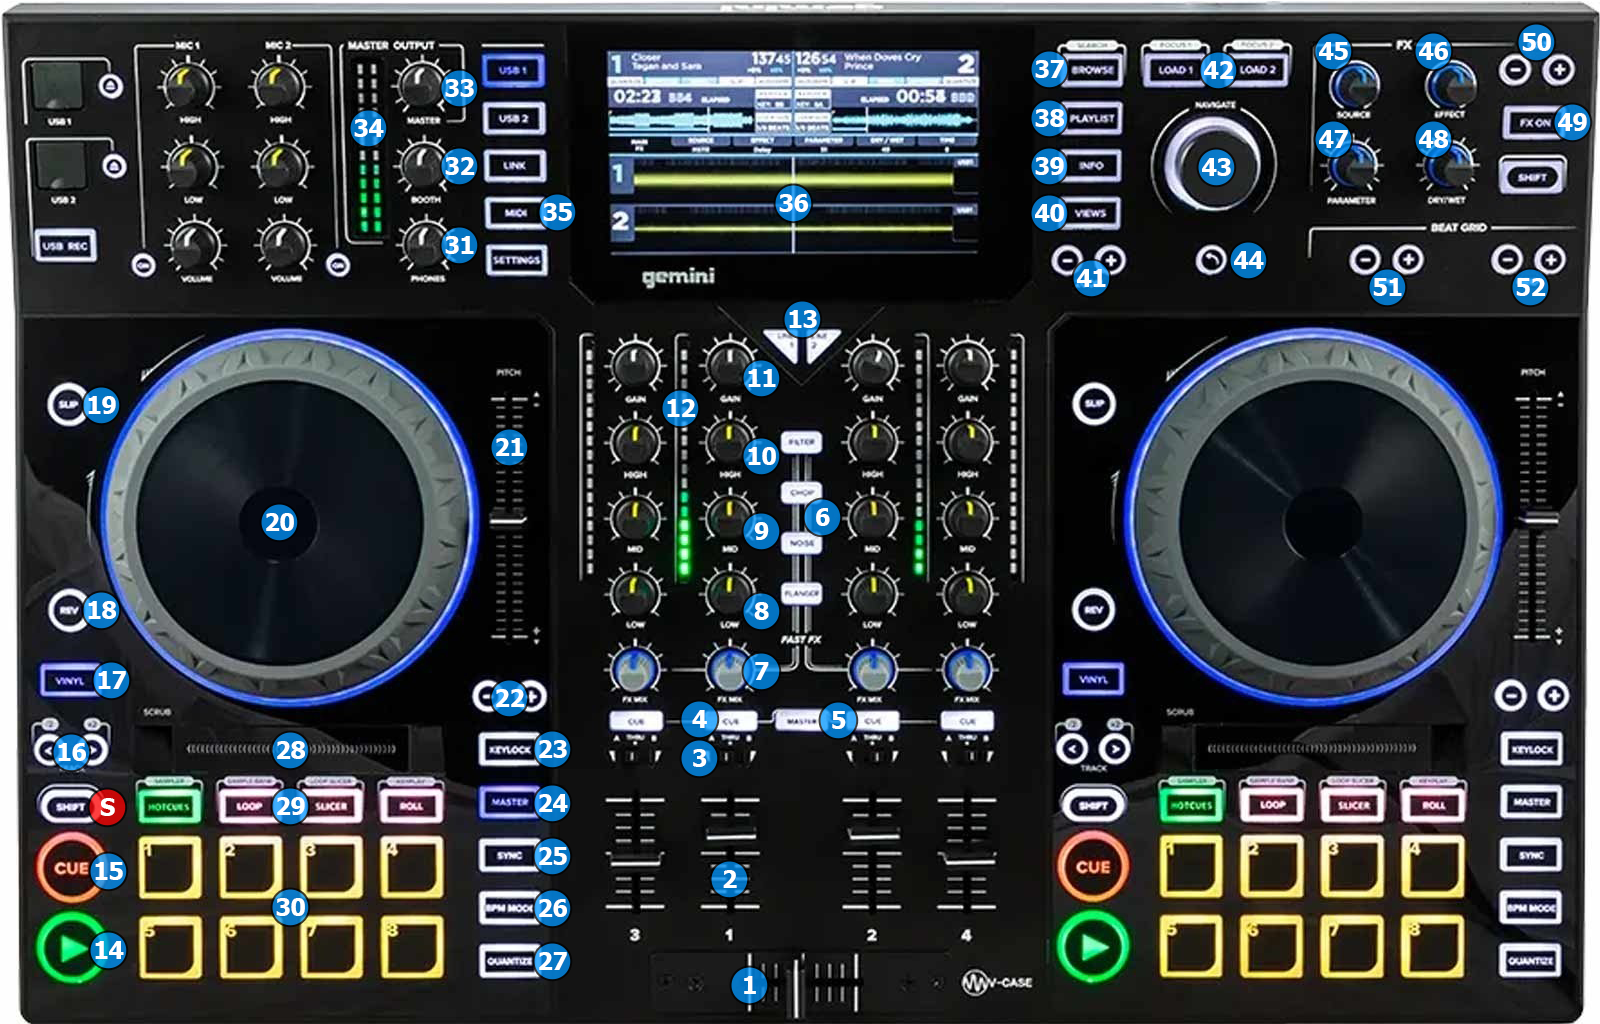


S SHIFT
Press this button down to access secondary actions as described in the SHIFT ACTION column.
HOLD this button to switch left or right deck between decks 1/3 and 2/4.

KEY

ACTION

SHIFT (SECONDARY) ACTION

1 CROSSFADER
When on far left position, only sound from the left decks will be heard from the Master Output. When at far right position, only the sound of the right decks will be heard from the Master Output. In all other positions, the audio signals from left/right decks will be blend.
2 VOLUME
Adjust the Volume of the decks.
3 CROSSFADER ASSIGN
Assign the deck to the left or right side of the crossfader.
4 PFL
Use these buttons to send the pre-fader audio signal of the decks to the Headphones channel for pre-listening.
5 MASTER PFL
Use this button to quickly send the master audio signal to the Headphones channel for pre-listening.
6 COLOR FX SELECT
Press one of these four buttons to select one Color Effect to apply on decks. The available effects are Filter, Cut, Noise & Flanger
7 COLOR FX ADJ
Turn these knobs to apply the selected Color Effect on the sound of the deck. When in center, the Color Effect turns off.
8 BASS
Use these knobs to cut/boost the frequencies of the Low/Bass Equalizer Band. No adjustment is made when the knob is at the middle/center position.
9 MEDIUM
Use these knobs to cut/boost the frequencies of the Middle/Medium Equalizer Band. No adjustment is made when the knob is at the middle/center position.
10 TREBLE
Use these knobs to cut/boost the frequencies of the High/Tremble Equalizer Band. No adjustment is made when the knob is at the middle/center position.
11 GAIN
Use these knobs to adjust the gain of each deck.
12 VUMETER
This LED bar shows the pre-fader volume level of each deck.
13 LINE1/2
No functions are assigned here.
14 PLAY/PAUSE
Press this button to start or pause the playback of the deck.
Press this button to start the playback of the deck or restart it from last start point (stutter).
15 CUE/STOP
Press this button stop the playback of the deck and return to the last cue point. Press this button while the deck is paused to store a temporary cue point.
Press this button to return to the start of the track.
16 PAD PARAMETERS
Use these buttons to control the first parameter of the selected pad page.
Use these buttons to control the second parameter of the selected pad page.
17 VINYL
Use this button to toggle the JOG between Scratch and Bending modes.
18 REVERSE
Press this button to toggle playback between normal (forward) and reverse direction.
Press this button to apply a momentary (while pressed) reverse effect. Upon release, the track will resume forward playback direction from the point it would have been if you hadn't used the button.
19 SLIP
Press this button to toggle Slip mode. While Slip mode is active, hotcues, loops, beatjumps and scratchs have a temporary effect, and the tracks always returns to the position it would have been if those actions were never used.
20 JOG
Touch sensitive Jog for Scratching, or Bending.
Use the JOG to seek quickly between different positions inside the track.
21 PITCH
Adjust the playback speed of the track.
22 PITCH BEND
Press these buttons to temporarily adjust the playback speed of the track (pitch bend). When you release the buttons the playback speed will return to the value dictated by the PITCH slider.
Press these buttons to change the range of the pitch slider.
23 KEYLOCK
Press this button to lock the track's KEY to it's current value.
24 MASTER
Press this button to manually set this deck as the "MASTER" deck. Hold this button for 1 second in order to resume automatic master deck selection.
25 SYNC
Press this button to sync the BPM (and pahse if the track is playing) from this deck with the "Master" deck.
26 BPM MODE
No function assigned here.
27 QUANTIZE
Press this button to toggle quantize mode. When quantize mode is enabled, loops, hotcues and beatjumps are snaped to the beatgrid.
28 SCRUB
No function assigned here.
29 PAD MODE
Press one of these buttons to switch the pads to one of the available modes. The factory default modes are hotcues, auto loop, slicer & loop roll
Press one of these buttons to switch the pads to one of the available secondary modes. The factory default modes are sampler, manual loop, beatjump & keycue.
30 PADS
The 8 pads perform various different operations depending on the selected pad mode. Please read VirtualDJ manual for more informations about pads and the various offered pad modes.
31 PHONES VOLUME
Turn this knob to adjust the volume of the headphones.
32 PHONES MIX
Turn this knob to blend the headphones audio between the decks signal (far left) and the master channel signal (far right)
33 MASTER VOLUME
Turn this knob to adjust the master volume.
34 MASTER VUMETER
This LED bar shows the post-fader level of the master output.
35 MIDI
Press this button twice to switch the unit from stand alone to computer controller mode.
36 SCREEN
Built in screen that shows various information about the tracks loaded on the 4 decks.
37 BROWSE
Press this button to load the selected track on the browser, on the first available deck if focus is on songs. If focus is on folders, press this button to return the focus on songs.
Press this button to switch the browser of VirtualDJ GUI to "zoom" mode.
38 PLAYLIST
Press this button to show or hide the Sideview panel on VirtualDJ GUI.
39 INFO
Press this button to show or hide the Info panel on VirtualDJ GUI.
40 VIEWS
Press this button to switch between the available panels of the Sideview (Sidelist, Automix, Sampler e.t.c).
41 ZOOM
Use these two buttons to change the zoom of the VirtualDJ waveforms.
42 LOAD
Press these buttons to load the selected track on the current left or right deck.
43 BROWSE ENCODER
Use this encoder to scroll up/down on the various lists of the browser.
44 BACK
Press this button to switch browser focus on the folders list. While focus is on folders list press this button to open or close subfolders.
Press this button to switch focus between the three main areas of the browser (Song list, Folders list and Sideview).
45 FX SOURCE
Turn this knob to select on which deck the effects are going to get applied.
46 FX SELECT
Turn this knob to select one of the available effects.
47 FX PARAMETER
Turn this knob to adjust the second paramter of the selected effect.
48 FX DRY/WET
Turn this knob to adjust the first parameter of the selected effect.
49 FX ON
Press this button to turn on/off the selected effect.
50 FX BEATS
Use these buttons to adjust the BPM timing of the selected effect (for beat-aware effects only).
51 BPM
Adjust the BPM of the deck that's selected as the effects deck.
Fine adjust the BPM of the deck that's selected as the effects deck.
52 GRID
Move the CBG of the deck that's selected as the effects deck.
Fine move the CBG of the deck that's selected as the effects deck.


For further Technical features and specifications, visit

Gemini SDJ-4000
Product's Page


Hardware Integration Department
2021 - ATOMIX PRODUCTIONS


Reproduction of this manual in full or in part without written permission from Atomix Productions is prohibited.